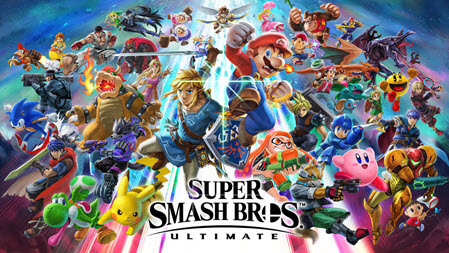
Super Smash Bros. Ultimate Strategy Guide, Image via: Bandai Namco Studios and Sora Ltd.
Overview of Super Smash Bros. Ultimate
•Game Mechanics: Super Smash Bros. Ultimate is a fighting game where players control characters from various Nintendo franchises and beyond, fighting in fast-paced, chaotic battles. The core mechanics involve knocking opponents off the stage, with damage percentages increasing how far characters are launched upon being hit.
New Features:
•Every Fighter Ever: Includes every character from previous games, making it the largest roster in the series with significant character updates and new moves.
•Echo Fighters: Characters that are variants of other fighters, offering slight twists on existing playstyles.
•Spirits Mode: A single-player adventure that introduces a new way to play, with spirits enhancing your fighters' abilities.
•Stage Morph: Allows stages to dynamically change during a match, adding strategic depth.
•Perfect Shielding: Introduced to make defense more skill-based, allowing for counterattacks if timed perfectly.
•Final Smash Meter: An alternative to Smash Balls where players can charge a meter to use their Final Smash.
What Sets it Apart:
•Content Volume: With over 80 fighters, numerous stages, and countless spirits, it's the most comprehensive Smash Bros. game.
•Quality of Life Improvements: Faster loading times, improved online play with Elite Smash, and more customization options for controls and gameplay rules.
•Inclusivity: By including characters from outside Nintendo's traditional lineup, it appeals to a broader gaming audience.
Understanding the Basics
How to Play:
•Objective: Knock opponents off the stage; the more damage they take, the easier they are to launch off.
•Victory Conditions: Be the last fighter standing in a free-for-all or win the most matches in a series.
•Game Modes: From classic 1v1 to team battles, Squad Strike, and various mini-games like Smashdown.
Controls:
•Movement: Stick for walking/running, jump buttons for vertical movement, and airdodging for quick directional changes in the air.
•Attacks: A, B, and Smash buttons for different types of attacks, with directional inputs modifying these attacks.
•Special Moves: Each character has unique specials (B button) that can be used for offense, recovery, or utility.
•Defense: Shielding with the R button, rolling, spot dodging, and grabbing/countering.
Basic Strategies for Beginners: 
•Learn Your Character: Understand your fighter’s moveset, strengths, and weaknesses. Start with someone you enjoy or who has an easy-to-learn moveset.
•Manage Damage: Know when to attack or defend based on your and your opponent's damage percentage. Higher damage means easier to KO.
•Stage Awareness: Use the stage to your advantage; know where ledges are, where platforms can be used for positioning, or where hazards might affect your strategy.
•Basic Combos: Even simple attack strings can be effective. Practice basic combos to increase your damage output.
•Recovery: Learn how to get back to the stage after being knocked off. Each character has different recovery moves.
•Adapt: Be prepared to change your strategy; if something isn't working, try a different approach or character.
Note: This introduction provides newcomers with a foundation to understand Super Smash Bros. Ultimate, setting them up for success as they dive into the game's rich, competitive environment. |
Controls and Movement
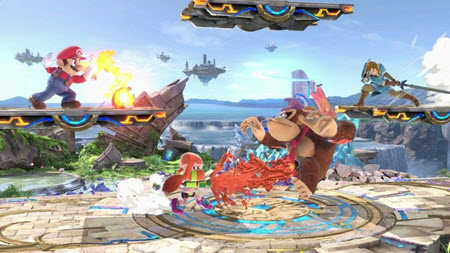
Mastering the Fundamentals in Super Smash Bros. Ultimate, Image via: Bandai Namco Studios and Sora Ltd.
Basic Controls:
•Movement: Use the control stick or D-pad for walking, running, and crouching. Double tap for dashing.
•Jumping: Up to three jumps (character-dependent) with jump buttons. Hold for a full jump, tap for a short hop.
Advanced Movement Techniques:
•Short Hopping: Quickly tap the jump button for a smaller jump, useful for aerial attacks or quick in-and-out movements.
•Short Hop Aerials (SHFFL): Short hop followed by an aerial attack, then fast fall (press down on the stick) to land quickly. This technique speeds up your attack execution.
•Dashing: Double tap left or right to dash, which can transition into dash attacks or be used for quick repositioning.
•Pivoting: Turn around quickly by tilting the stick in one direction then immediately the opposite. Useful for attacks or grabs from behind.
•Wavedashing (pseudo): While not true wavedashing, similar effects can be achieved by jumping, then immediately air dodging into the ground at an angle, allowing for quick sliding movement.
Attack Types
Standard Attacks:
•Jab: Quick, repeated attacks by pressing the attack button. Good for starting combos.
•Tilt Attacks: Slightly stronger than jabs, performed by tilting the stick slightly and pressing attack. Useful for spacing.
Special Moves:
•B-Button Moves: Each character has four special moves (neutral, side, up, down) with unique effects. Learn when to use each for offense, defense, or recovery.
Smash Attacks:
•Chargeable: Hold the attack button with a direction for a powerful, directional attack. Essential for knocking opponents off the stage.
Aerials:
•Neutral, Forward, Back, Up, Down Airs: Five different aerial attacks, each with unique trajectories and uses. Master these for aerial combat and recovery.
Grabs and Throws:
•Grab: Close combat to catch opponents. Can lead into throws or grabs.
•Throws: Four directions, each potentially leading into different follow-ups or stage positioning.
Defense Techniques
Shielding:
•Basic Shield: Press R or ZL to block incoming attacks. Your shield depletes with use or if hit with strong attacks.
•Perfect Shielding: Hit shield just as an attack lands for no shield damage and a brief invincibility frame, allowing for immediate counterattacks.
Dodging:
•Roll: Dodge left or right by tilting the stick and pressing shield.
•Spot Dodge: Press down on the stick and shield for an in-place dodge, useful against grabs or quick attacks.
•Air Dodge: Press shield in the air for a brief invulnerability. Can be directed for movement but leaves you vulnerable after.
Recovery
•Up Special Moves: Typically used for vertical recovery, but can vary widely in utility (e.g., recovery, spike, or combo starter).
Recovery Techniques:
•Edge Cancelling: Use an attack or special move to cancel recovery animation when grabbing the ledge, allowing for quicker recovery or surprise attacks.
•Edge Sweet Spotting: Learn the sweet spot on the ledge where your character grabs it instantly, reducing vulnerability time.
•Mix-ups: Don't always use the same recovery path; mix up your approach to keep opponents guessing.
•Second Jump: Use your double jump wisely; sometimes, it's better to save it for after your up special for extra height or distance.
Character-Specific Recovery:
•Each fighter has unique recovery mechanics. For example, Mario can use his cape to stall or spin jump for extra height, while characters like Fox rely more on their up special's distance.
Next: Advanced Combat Techniques in Super Smash Bros. Ultimate
Character Roster
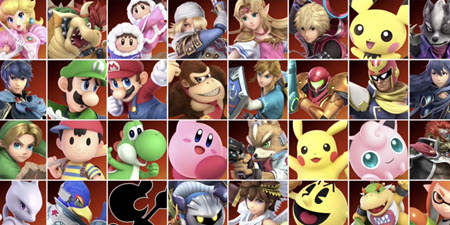
Character Selection in Super Smash Bros. Ultimate, Image via: Bandai Namco Studios and Sora Ltd.
Mario:
Versatile with balanced stats. Good for beginners with a mix of ranged and melee options.
•Strengths: Reliable recovery, decent speed, and a variety of moves.
•Weaknesses: Lacks extreme advantages in any single area.
Donkey Kong:
Heavy hitter with strong attacks but slow speed.
•Strengths: High damage output, effective grabs.
•Weaknesses: Slow movement, predictable recovery.
Link:
A zoner with projectiles and good range but slower movement.
•Strengths: Effective at keeping distance, good projectiles.
•Weaknesses: Heavy, making recovery and mobility challenging.
Pikachu:
Fast, with excellent aerial game and recovery.
•Strengths: Quick, high damage potential with Thunder Jolt.
•Weaknesses: Lower weight class, can be comboed easily.
Samus/Dark Samus:
Long-range fighters with bombs, missiles, and charge shot.
•Strengths: Great zoning capabilities, strong recovery.
•Weaknesses: Slow start-up on some moves, vulnerable in close combat.
Yoshi:
Unique flutter jump and egg throw, very resistant to combos.
•Strengths: Excellent recovery, hard to KO.
•Weaknesses: Lacks range, struggles against fast opponents.
Kirby:
Can copy opponents' abilities, making him adaptable.
•Strengths: High survivability, versatile with copied moves.
•Weaknesses: Low damage output, slow ground speed.
Fox:
High speed and damage, but requires precise inputs.
•Strengths: Speed, combo potential, good recovery.
•Weaknesses: Light, can be KO'd early if not careful.
Pikmin & Olimar:
Unique mechanics with Pikmin, effective at zoning.
•Strengths: Control over multiple Pikmin for attacks.
•Weaknesses: Slow without Pikmin, Pikmin can be removed.
Luigi:
Similar to Mario but with higher knockback on attacks and unique recovery.
•Strengths: High damage and knockback, good recovery with Super Jump Punch.
•Weaknesses: Slower, less consistent than Mario.
This pattern continues for each character, highlighting their unique playstyles, advantages, and challenges.
Tier List
•S-Tier: Characters considered among the best competitively due to their versatility, damage output, and recovery options. Examples might include Pikachu, Joker, and Palutena, based on current meta analysis.
•A-Tier: Strong characters that can compete at high levels but might have more pronounced weaknesses or less versatile matchups. Characters like Mario, Fox, or Peach could be here.
•B-Tier: Reliable characters that require more specific strategies or skill to shine. Examples include Link or Samus.
•C-Tier: Characters with clear advantages in certain situations but generally less favored in competitive play. Yoshi or Donkey Kong might fall here.
•D-Tier: Characters that have significant disadvantages or require a high level of mastery to be competitive. This might include Kirby in some tier lists due to his slower speed and lower damage output.
•Note: Tier lists are subject to change with updates, meta shifts, and new strategies being developed. Always check the latest community or professional tier lists for the most current insights.
Matchup Strategies 
Understanding Matchups:
•Study Character Matchups: Each character has favorable and unfavorable matchups. Knowing these can guide your character selection or strategy.
General Advice:
•Adaptability: Learn how to play against different styles, not just characters. Some players might use a character in an unconventional way.
•Spacing: Keep the right distance with zoners, close in on rush-down characters.
Counter-Picking:
•Choose Wisely: If you can, select a character that has a favorable matchup against your opponent's choice. For example, using a character with good anti-air options against someone who relies on aerial attacks.
•Stage Selection: Some stages can benefit or hinder certain characters. Pick or ban stages based on how they affect the matchup.
Strategic Play:
•Exploit Weaknesses: If your opponent's character has poor recovery, focus on edge guarding. If they're slow, play a more aggressive game.
•Mind Games: Use your knowledge of the matchup to bait out predictable moves or force your opponent into less favorable positions.
Preparation:
•Practice: Spend time in training mode or against friends with characters you struggle against. Understand not just the matchup but also common strategies used with that character.
Note: By understanding the roster, keeping up with tier lists, and knowing how to approach various matchups, players can significantly improve their performance in Super Smash Bros. Ultimate. Remember, while tier lists give an indication of a character's potential, player skill and matchup knowledge can often level the playing field. |
Note: Mastering these fundamentals will give players the foundation needed to compete effectively, adapt to different playstyles, and understand how to leverage characters' unique abilities in Super Smash Bros. Ultimate. |
Next: Stage Selection in Super Smash Bros. Ultimate
Next: Items and Assist Trophies in Super Smash Bros. Ultimate
Stage Overview
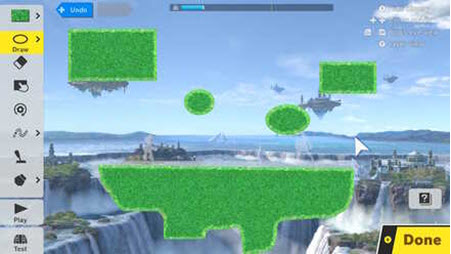
Stage Selection in Super Smash Bros. Ultimate, Image via: Bandai Namco Studios and Sora Ltd.
Here's a look at some key stages in Super Smash Bros. Ultimate, focusing on their layout, hazards, and strategic implications:
Final Destination:
•Layout: Flat, single platform with no hazards.
•Advantages: Great for characters with strong neutral games or for precise combos; no interruptions from stage elements.
•Disadvantages: Limits vertical play; less advantageous for characters relying on platform movement or stage hazards.
Battlefield:
•Layout: One main platform with three smaller platforms above.
•Advantages: Offers more vertical gameplay, good for juggling, recovery, and platform camping.
•Disadvantages: Can be harder to edge guard due to multiple recovery options.
Yoshi's Story:
•Layout: Similar to Battlefield but with soft platforms that absorb knockback.
•Hazards: Random clouds appear, changing platform positions.
•Strategy: Good for characters with strong aerial games; clouds can be used for surprise attacks or recovery.
Pokémon Stadium 2:
•Layout: Varies with transformations but starts as a simple Battlefield-like stage.
•Hazards: Stage morphs into different forms, each with unique hazards.
•Strategy: Adaptability is key; knowing when to fight or avoid the stage's transformations.
Smashville:
•Layout: Single platform with a moving platform above that follows a set path.
•Advantages: The moving platform can be used for evasion, recovery, or setting up combos.
•Disadvantages: Predictable movement can be exploited by opponents.
Kalos Pokémon League:
•Layout: Complex with multiple platforms at varying heights.
•Hazards: Ice patches can slow players down, and moving platforms.
•Strategy: Excellent for characters that thrive in chaotic battles or those with good ledge trapping.
Lylat Cruise:
•Hazards: Tilts and slopes can change the stage's angle, affecting movement and hitboxes.
•Strategy: Requires constant adaptation to the stage's tilt; good for edge guarding due to unique stage geometry.
Stage Selection Strategy 
Character-Specific Stages:
•Platform Characters (like Mario, Ness): Benefit from stages like Battlefield or Smashville where they can use platforms for combos or recovery.
•Zoners (like Samus, Link): Prefer open stages like Final Destination or FD variants for less obstruction in their projectile game.
•Heavy Characters (like Bowser, Ganondorf): Might do well on stages with hazards that can disrupt lighter, faster characters, though they need to manage recovery carefully.
Counter-Picking Stages:
•Against Characters with Poor Recovery: Pick stages with complex layouts or hazards like Kalos Pokémon League to make edge guarding easier.
•Versus Rushdown Characters: Choose stages with platforms or hazards to break up their aggressive play, like Yoshi's Story or Pokémon Stadium 2.
•For Neutral Game: If you excel at neutral, Final Destination or stages with minimal hazards can minimize the opponent's environmental advantages.
•Stage Bans: In competitive play, ban stages that counter your character's strengths or where you know your opponent excels.
Stage Hazards
Utilizing Hazards:
•Moving Platforms: Use these for surprise attacks, recovery mix-ups, or to evade opponents.
•Environmental Effects: Like wind in Skyloft or water currents in Great Bay, these can be used to influence opponents' movement or recovery.
Avoiding Hazards:
•Predictability: Learn the patterns of stage changes or hazards to avoid them or use them to your advantage.
•Positioning: Stay aware of where you are on the stage relative to hazards. For example, staying away from the edges on Lylat Cruise when it's tilted.
•Hazard Toggle: In competitive play, stages are often played without hazards (Omega or Battlefield forms) for consistency, but understanding how to deal with them in casual play can be a significant advantage.
Note: By mastering stage selection and understanding how to leverage or mitigate the unique aspects of each stage, players can significantly enhance their strategic gameplay in Super Smash Bros. Ultimate. Remember, stage control can be as crucial as character matchups in determining the outcome of matches. |
Combos and Strings

Advanced Combat Techniques in Super Smash Bros. Ultimate, Image via: Bandai Namco Studios and Sora Ltd.
Understanding Combo Mechanics:
•Hitstun: The duration an opponent is stunned after being hit, crucial for combo execution.
•Frame Data: Knowledge of how long attacks take to come out, hit, and recover helps in linking moves together.
Character-Specific Combos:
•Bread and Butter Combos: Each character has basic combos that work at various damage percentages. For example:
•Pikachu: Down throw to up air for low to mid percentages.
•Fox: Up throw into up air or nair for juggling.
•Advanced Combos: Higher skill combos that might involve precise timing or reading opponent's DI (directional influence).
Extending Damage:
•Tech Chasing: Predicting and countering an opponent's tech (getting up from being knocked down) to continue combos.
•Juggling: Keeping an opponent in the air with aerial attacks or up tilt moves.
•Stage Positioning: Use of stage features like platforms to extend combos or keep opponents in disadvantageous positions.
Edge Guarding
Preventing Recovery:
•Off-Stage Play: Learn when to go off-stage to intercept recovery moves:
•Edge Sweetspot: Stay near the ledge to intercept those aiming for a quick grab.
•Stage Spikes: Hit opponents downwards to prevent them from grabbing the ledge.
Techniques:
•Projectile Edge Guarding: Characters with projectiles can shoot or drop them off-stage.
•Aerial Edge Guarding: Using quick, safe aerials to poke at recovering opponents.
•Ledge Trumping: Jumping off the stage to land on the ledge behind your opponent, knocking them off.
•Adaptability: Different characters require different edge guarding strategies. Reading your opponent's recovery pattern is key.
Ledging and Ledge Traps
Offensive Use of Ledges:
•Ledge Attacks: Use these sparingly but effectively when your opponent is too close to the ledge.
•Invincibility Frames: Utilize the brief invincibility when grabbing the ledge to bait out attacks.
Defensive Ledge Trapping:
•Positioning: Hang at the ledge, then jump or roll back onto the stage to catch opponents off-guard with an attack.
•Ledge Trap Setups: After knocking an opponent off, position yourself to cover their options when they attempt to grab the ledge:
•Charged Smash Attacks or Grabs: Predicting a roll, jump, or getup attack.
•Mix-Ups: Vary your ledge interactions to keep opponents guessing, like sometimes opting for a neutral getup or roll.
Mind Games and Baiting 
Psychological Tactics:
•Feinting: Start an attack but don't commit, making opponents react prematurely or waste their shield.
•Baiting: Act in a way that makes your opponent do something predictable, like jumping when they think they're safe or shielding when they expect an attack.
Reading Opponents:
•Habit Recognition: Notice patterns in how your opponent reacts to certain situations.
•DI Prediction: Anticipate directional influence to continue combos or end them with a KO move.
Deception:
•False Retreats: Pretend to back off to draw opponents forward into an ambush or to set up a counter.
•Shield Pressure: Use safe moves to pressure a shield, baiting a spot dodge or roll for punishment.
Adaptation:
•Reacting to Adaptation: As your opponent adjusts to your strategies, you must also evolve, perhaps by changing your approach or character.
Note: Mastering these advanced combat techniques will elevate your gameplay in Super Smash Bros. Ultimate, turning you into a more strategic and unpredictable player. Remember, the key to these advanced strategies is not just knowing them but applying them at the right moment, based on reading your opponent's habits and the flow of the match. |
Next: Game Modes and Multiplayer in Super Smash Bros. Ultimate
Item Usage
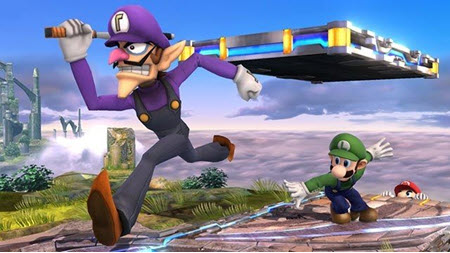
Items and Assist Trophies in Super Smash Bros. Ultimate, Image via: Bandai Namco Studios and Sora Ltd.
Strategies for Using Items:
•Timing: Use items at opportune moments. For example, throw a Bob-omb when your opponent is recovering to prevent them from returning to the stage.
Item Knowledge: Understand what each item does:
•Healing Items (like Maxim Tomato, Heart Container): Use when you're at a health disadvantage or to stay in the game longer.
•Projectile Items (like Ray Gun, Super Scope): Great for zoning, especially if your character lacks good ranged attacks.
•Transformative Items (like Super Mushroom, Poison Mushroom): Can be used to either grow large for an advantage or shrink to dodge attacks.
•Explosives (like Bob-ombs, Gooey Bombs): Effective for edge guarding or area denial.
•Item Combo: Integrate items into your combos. A well-timed item can extend your combo or lead into a KO.
Strategies for Avoiding Items: 
•Prioritize Game Plan: If items are not part of your strategy, focus on avoiding them, especially if they could disrupt your momentum.
•Dodging: Use rolls, spot dodges, or jump to evade thrown or dropped items.
•Shield: Items can often be blocked with a shield, but be wary of items that can break through shields.
When to Turn Items On or Off:
•Casual Play: Items can add fun and unpredictability, making matches more dynamic for less competitive settings.
•Competitive Play: Typically, items are turned off for fairness and to emphasize player skill over luck. However, some tournaments might have item-based side events.
•Item Frequency: Adjust item spawn rates based on how much you want items to influence the match. Lower rates can still provide strategic moments without overwhelming the gameplay.
Assist Trophies
Dealing with Assist Trophies:
•Recognition: Quickly identify what assist trophy has been summoned to adapt your strategy:
•Offensive Assists (like Alucard, Knuckles): Be ready to defend or dodge their attacks.
•Defensive or Support Assists (like Lakitu, Jeff): Can provide heals, shields, or disrupt opponents.
Countering: Some assists can be defeated or neutralized:
•Direct Attack: Quickly dispose of assists like Metroid or Spring Man before they can cause significant damage.
•Positioning: Stay away from their effective range or use them as a shield against your opponent's attacks.
Using Assist Trophies to Your Advantage:
•Timing: Summon assists when they can have the most impact, such as during an opponent's recovery or when they are at high damage.
•Stage Control: Use assists to control space or force your opponent into less favorable positions. For example, using a character like Waluigi to block platforms or paths.
•Combo Starters: Some assists can stun or disrupt opponents, setting up for your own follow-up attacks.
•Reading Opponents: If you know your opponent fears certain assists, you can bait their reactions or even use less threatening assists to lower their guard for a real attack.
•Adaptation: Assists can change the dynamics of a match. Adapt by either focusing on ending the match quickly before an assist shows up or using the assist's presence to plan your next moves.
•Random Factor: While assists introduce randomness, understanding how to react or use them strategically can turn what might seem like bad luck into an advantage.
Note: In summary, both items and assist trophies can drastically change the flow and strategy of matches in Super Smash Bros. Ultimate. Players should learn not only how to use these elements to their benefit but also how to mitigate their disadvantages. Whether items are turned on or off, understanding their mechanics can provide an edge in both casual and more strategic play. |
